When you load XYFX as an insert on your audio track in MPC Desktop, you may notice that the plugin window opens without showing any mappable controls.
Instead, you can access and adjust its parameters from another section of the MPC interface. This is because XYFX is designed to be controlled directly using the MPC’s Q-Link interface.
Please follow the steps below to get started:
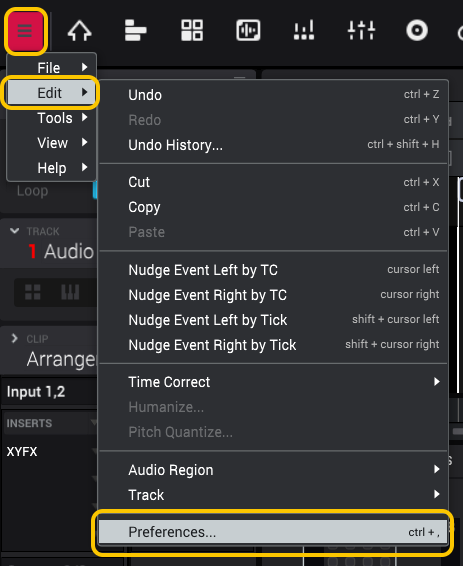
1. Click the 3 lines in the top left corner of your screen and select Edit > Preferences.
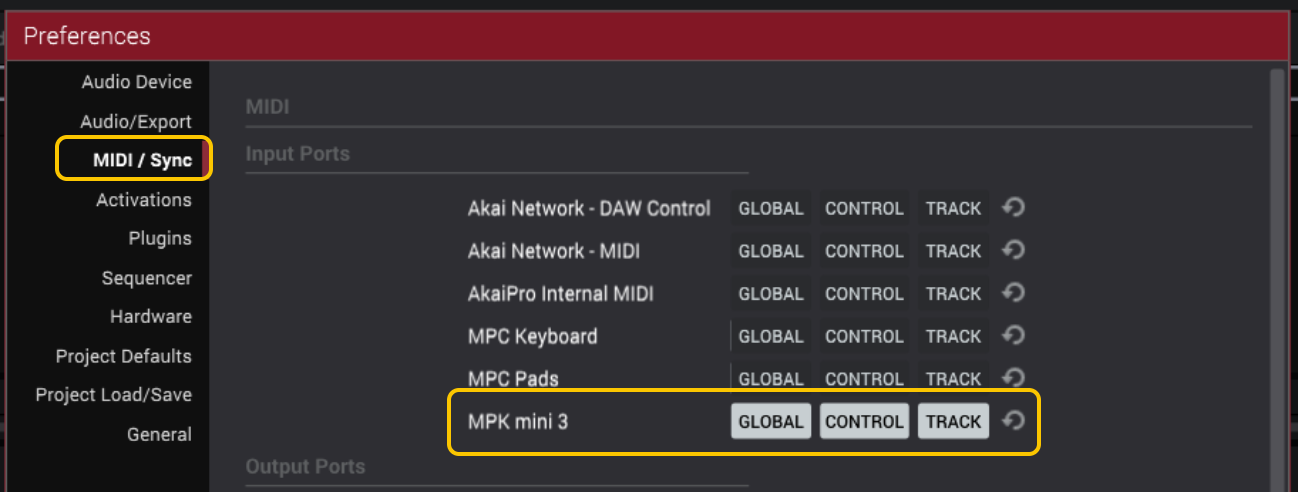
2. Click the MIDI/Sync tab, and ensure all options are enabled for your MIDI controller under the Input Ports section.
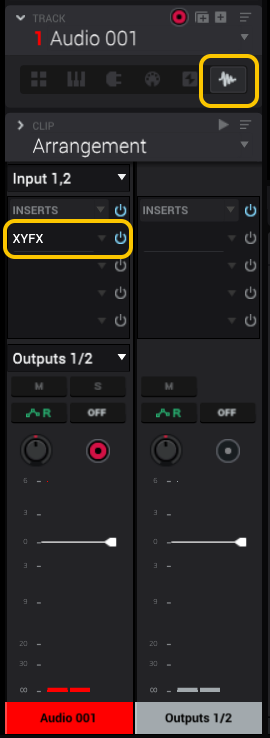
3. If you haven't already, create an audio track, click on an empty insert, and select XYFX under the Harmonic category.
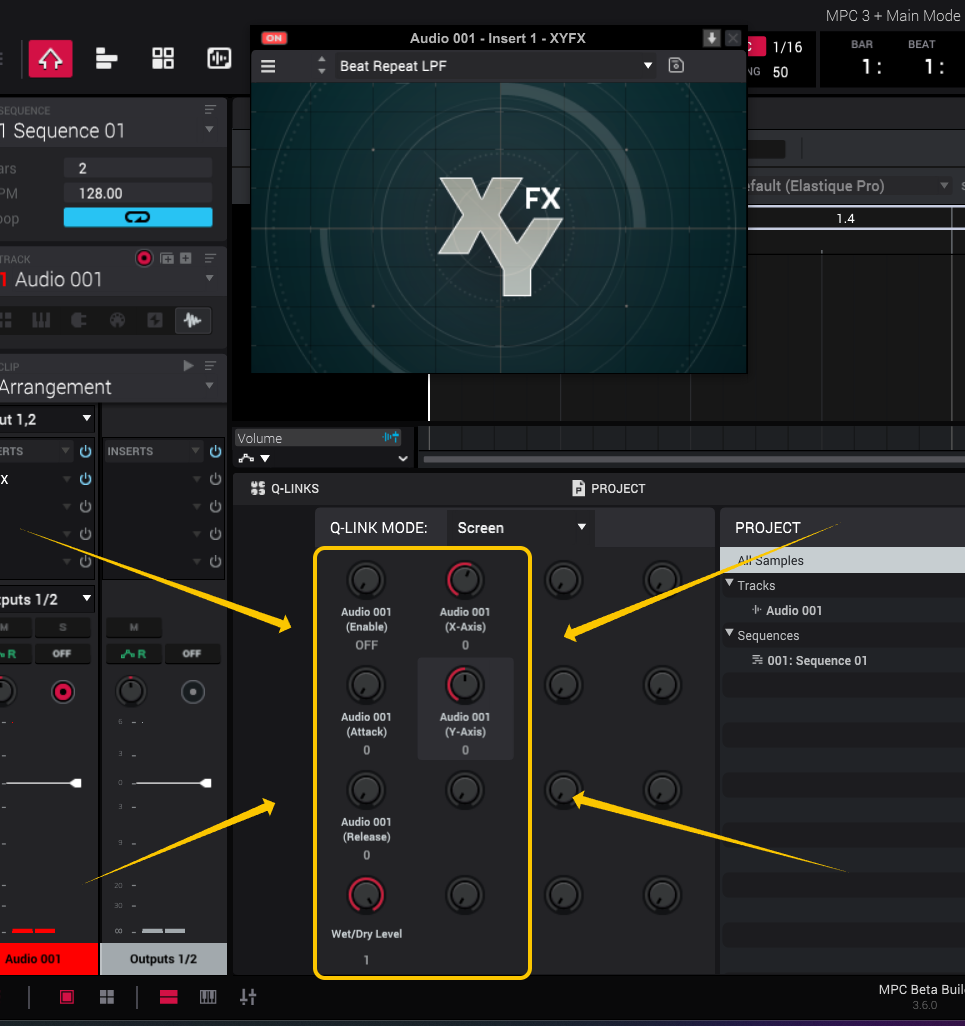
4. With XYFX loaded on an audio track, press Shift + F on your computer keyboard, which will reveal the bottom panel.
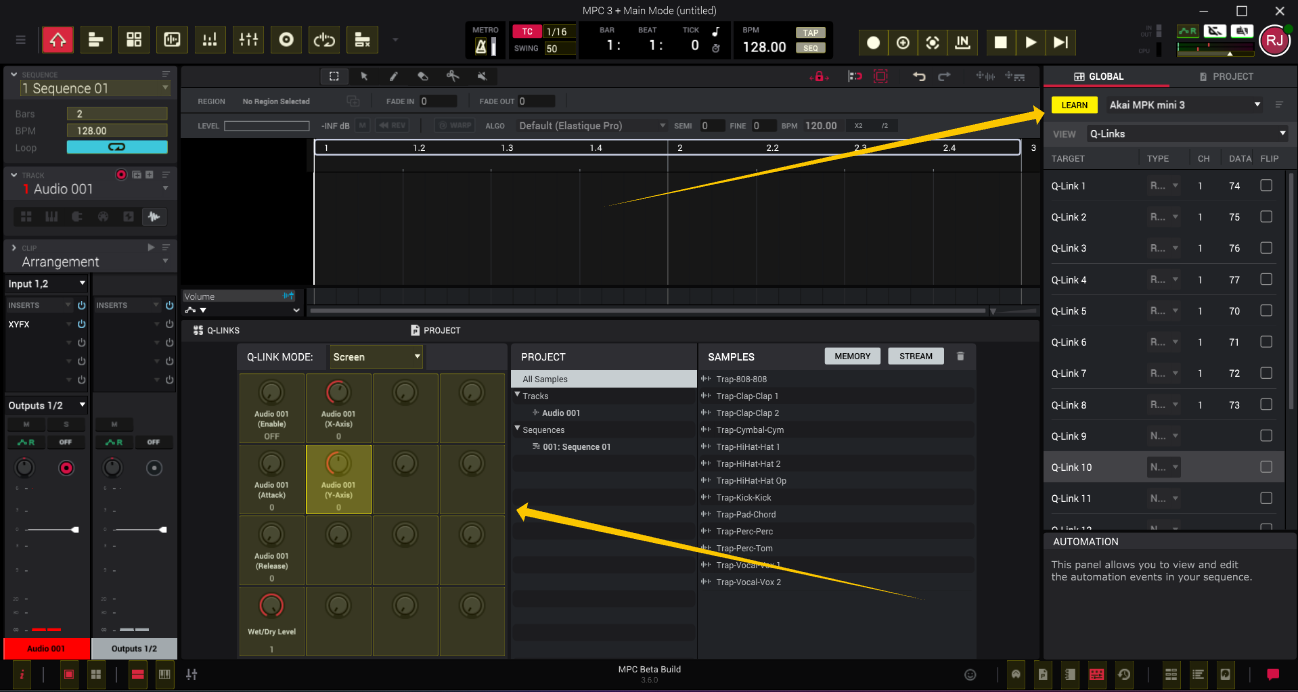
5. You’ll now see X‑axis, Y‑axis, and other related controls at the bottom of the screen, which are the main mappable parameters for XYFX.
6. To map your MIDI keyboard to these parameters, simply press CTRL + Shift + L on your computer keyboard to open the MIDI Learn tab, then click the LEARN button. You'll notice the XYFX parameter controls turn yellow. Simply click on one of them and move a control on your MIDI controller to assign it.
7. When finished, simply click the LEARN button again to deactivate it and you'll be ready to start controlling the XYFX plugin.