This article will cover the basics steps/requirements to record your Alesis module's in-built kits in your Digital Audio Workstation (DAW).
TABLE OF CONTENTS
Connecting the Module to your USB audio interface
A USB audio interface serves as a crucial tool that enables the seamless transmission of audio signals, converting them into digital audio signals from a variety of audio devices, such as the Alesis Module. Once you have it set up correctly, the audio signals will be effectively routed to your computer or digital audio workstation (DAW), allowing for enhanced recording, manipulation, and playback of your audio projects.
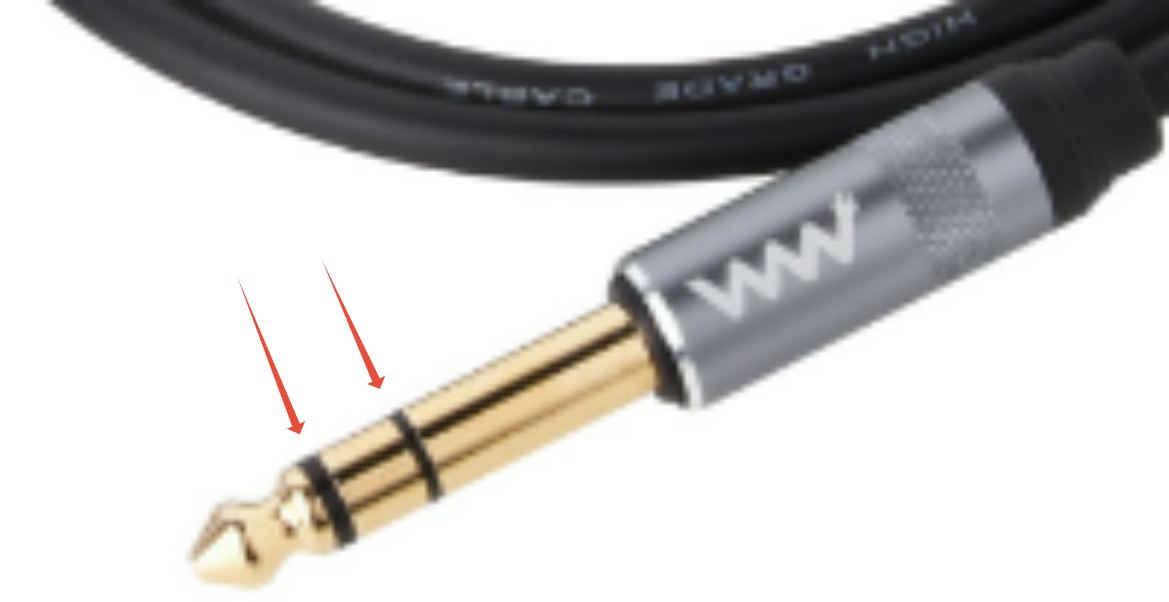
1. Obtain standard 1/4" (6.35 mm) TRS audio cables. TRS audio cables will have 2 black rings around the jack:
Note: If your module uses XLR Main Outputs - use a standard XLR cable instead.
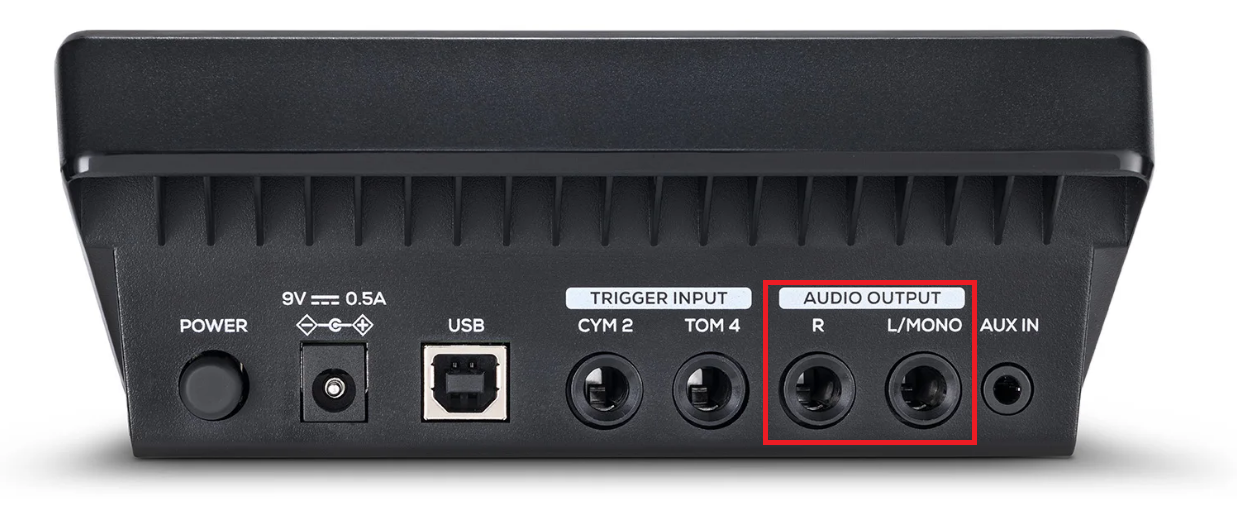
2. Connect the 1/4" cables to the Alesis module's main outputs. Depending on your preferences, you have the option to use the L output or L/R outputs
- L input (Mono: 1 channel of audio)
- L/R inputs (Stereo: 2 channels of audio)
3. Connect the other end of the jack to the interfaces inputs. Depending on your preferences, you have the option to use the L output or L/R outputs
- L input (Mono: 1 channel of audio)
- L/R inputs (Stereo: 2 channels of audio)
Note: If your interface has a Line/Inst switch, ensure you have set it to Line
Connecting your audio interface to your computer
1. Connect your audio interface to your computers USB port.

2. Install the available drivers if available/applicable. This will usually be found on the manufacturers website.
3. Configure the audio interface as the primary audio input/output device in your DAW's audio preferences.
Audio output monitoring
When a USB audio interface is connected to your computer, all audio will be routed to the interface - and then into your computer/DAW. In order to monitor the module's kits when recording/playing, you will need to use the following set up:
External Monitor/Speaker Set Up: Use standard 1/4" (6.35 mm) TRS audio cables. TRS audio cables will have 2 black rings around the jack:
Connect the jacks to the Main Outputs on the interface
Connect the other end of the jacks to the Inputs of the external monitors/speakers:

Headphone Set Up: If you do not have external monitors/speakers, you can use headphones. Obtain a standard pair of 1/4" (6.35 mm) TRS (Stereo) headphones.
TRS headphones will have 2 black rings around the jack:
Connect the jack to the headphone port on the interface

Note: Some interfaces may use a 3.5mm headphone port, in this case connect a standard pair of 3.5mm headphones.
It is important to note that your DAW will receive audio input from the input port you have chosen on your interface.
Note: The following example will cover the steps when the Alesis module is connected to Input 1 or Input 1+2 of the audio interface. If you've connected the module's outputs to another set of inputs on your audio interface, please apply the below steps according to your scenario.
Scenario 1 - Mono: If the Alesis module's main outputs are connected to Input 1 on your interface, select Input 1 in your DAW:

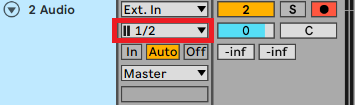
Scenario 2 - Stereo: If the Alesis module's main outputs are connected to Input 1 and 2 on your interface, select Input 1/2 in your DAW:
Recording to your DAW
The final step is to Record-arm your audio track(s). Then press the Global Record button in your DAW: