
In this article we will go through the steps to map your MPC plugin instrument parameters to your MIDI controller in MPC in Standalone mode and within MPC 2.0/MPC Beats.
TABLE OF CONTENTS
Overview
You can use the MIDI Learn function to assign external MIDI controllers to various parameters in your specific MPC project:
• Mixer parameters such as volume, pan, mute, and solo for tracks, returns, submixes, and main outputs.
• Pad parameters (for drum tracks only) such as tuning, filter and amp envelopes, layer settings, LFO settings, and velocity.
• Track parameters, which depend on the track type.
• Insert effects parameters, which depend on the effect type.
These assignments will be saved with your MPC project.
MPC Standalone
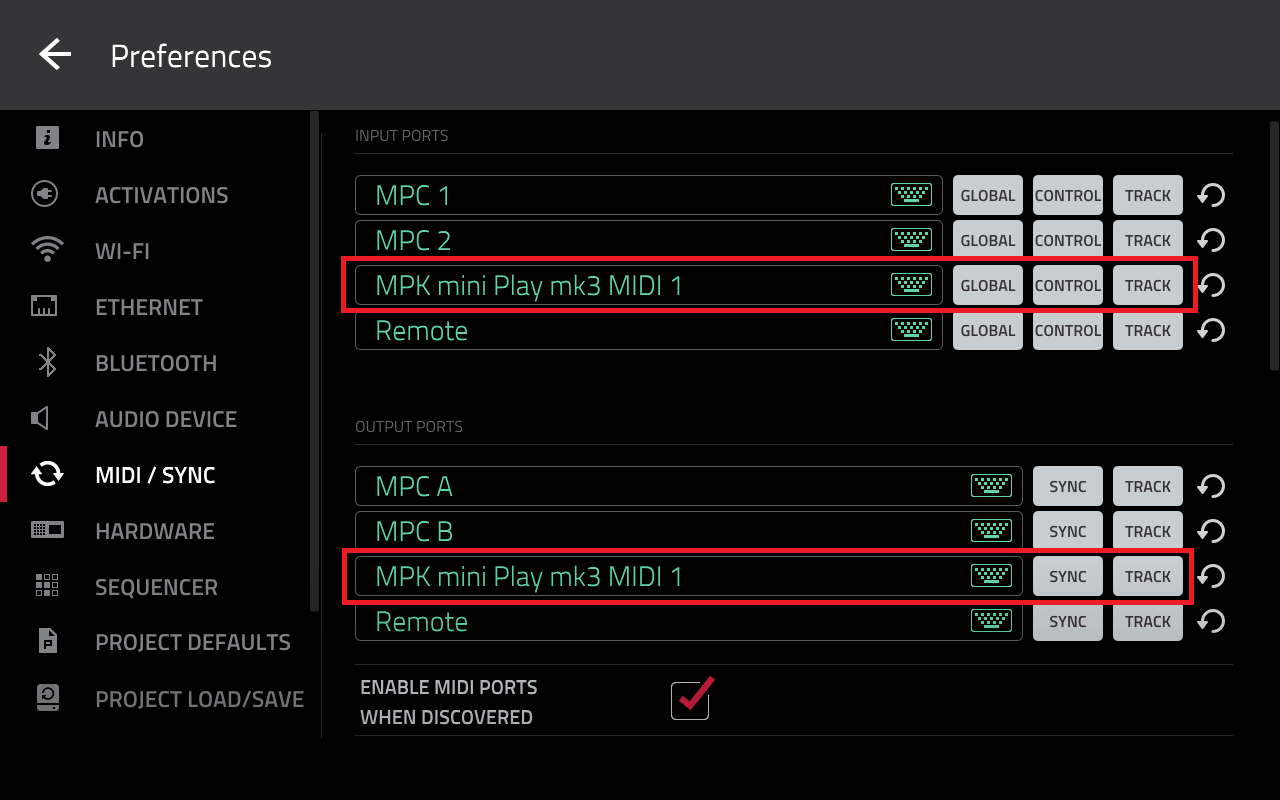
1. On your MPC, go to Menu > MIDI / Sync and ensure you MIDI controller has been set to the following:
Input Ports: Global, Control & Track (ON)
Output Ports: Sync & Track (ON)
2. Load a plugin instrument
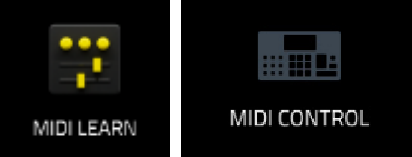
3. Go to the Main Menu, and enter MIDI Learn (MPC 3) or MIDI Control: MIDI Learn (MPC 2)
4. Tap LEARN (MPC 3) or LEARN + ENABLE MAPPING (MPC 2)
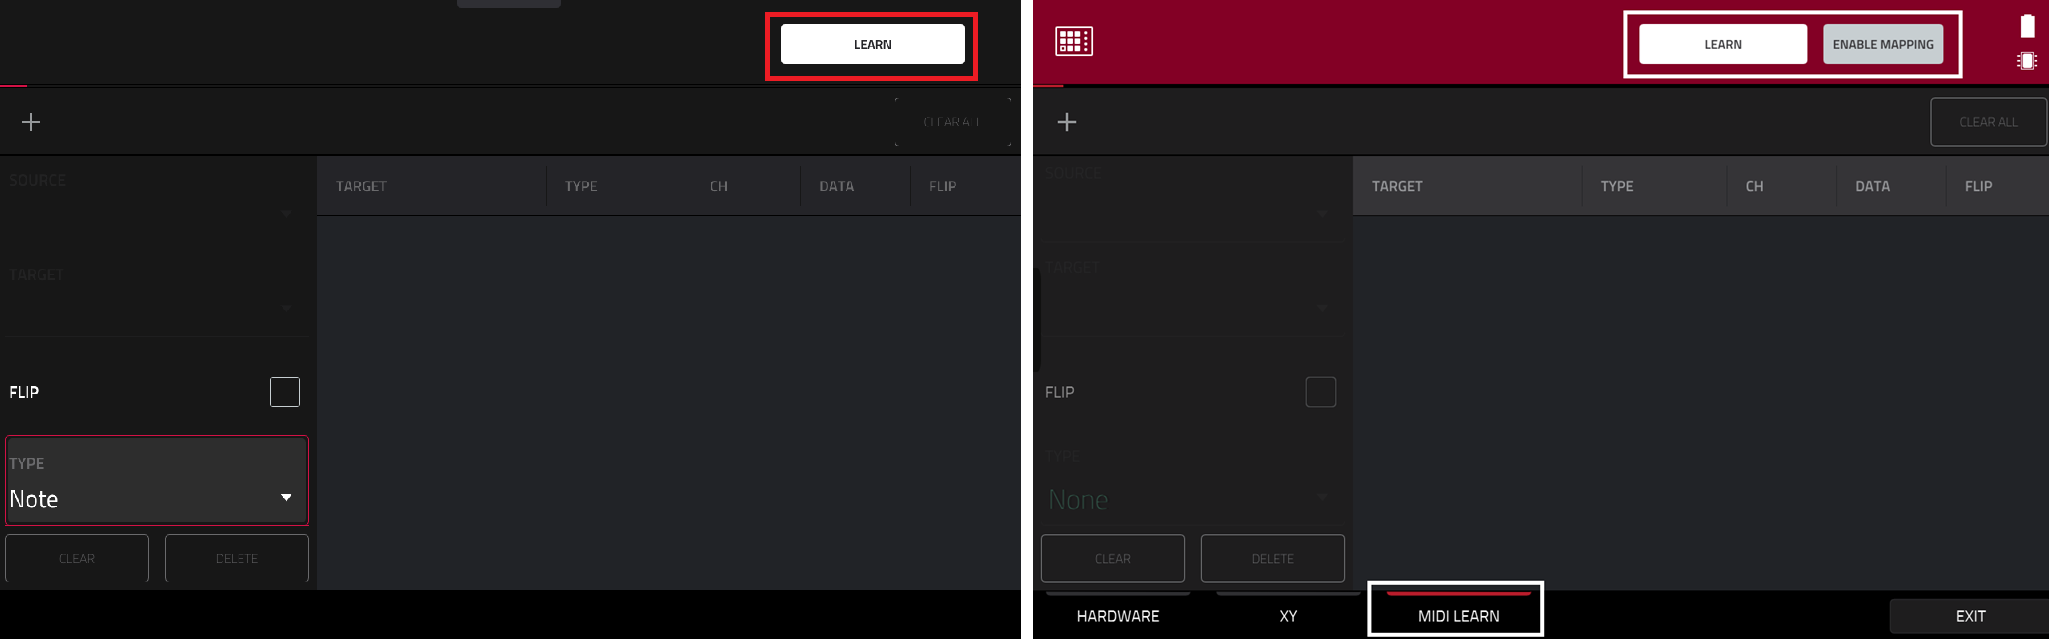
5. Tap the + icon in the top left section of the screen
6. Tap Source & select Program > Plugin 001
7. Tap Target & select Program.
From here, select the plugin parameter you wish to map

8. Once selected, manually move the parameter on your MIDI controller that you wish to apply the mapping to. The MIDI Type, Channel, and CC of the Fader/Knob you moved will appear next to your chosen parameter
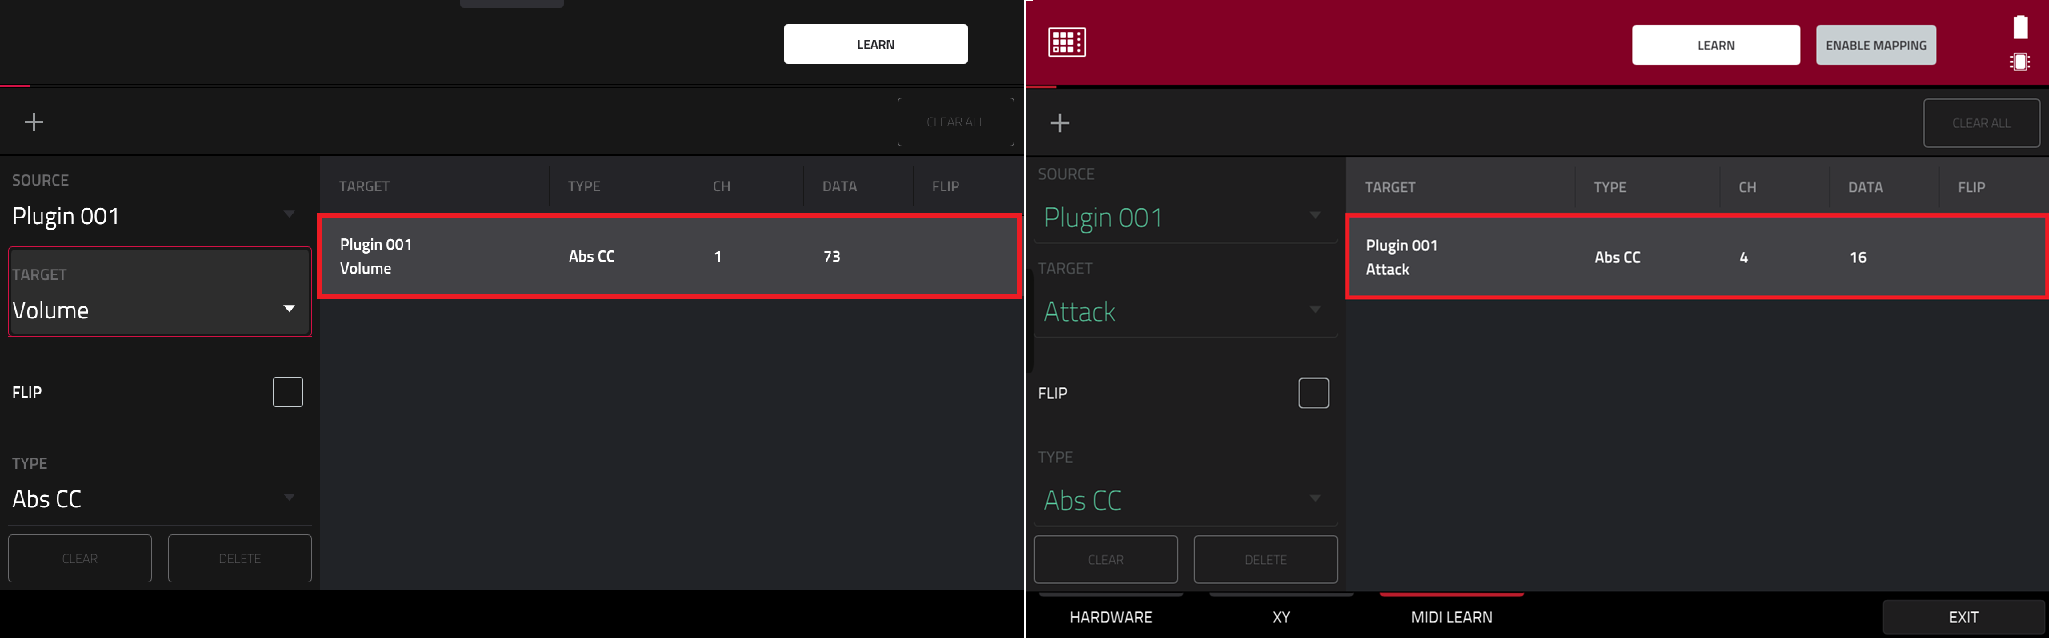
9. Repeat steps 5 to 8 until all plugin parameters have been mapped to your MIDI controller
Once you have completed your mappings, return to you project by pressing the Main button.
That's it, your controller is now mapped!
To learn more about MIDI Control, please refer to the following article: Akai Pro MPC Series | Configuring MIDI Ports for Multi-MIDI Control : Akai Professional
MPC 2 and MPC Beats Software
1) Launch MPC 2, go to Menu > Edit > Preference > MIDI / Sync and configure your MIDI controller to the following settings:
Input: Global, Control & Track
Output: Sync & Track

2) Load your plugin instrument:

3) Enter Program Edit mode:

4) Click on the MIDI Learn icon in the bottom right section of MPC 2:

5) Click Learn and Enable
Note: Remember to select your MIDI controller in the dropdown menu. In this example, we are using an MPK Mini Play:

6) Select the parameter type you wish to map:

7) Then manually move the parameter on your MIDI controller that you wish to apply the mapping to. The MIDI Type, Channel, and CC of the Fader/Knob you moved will appear next to your chosen parameter
In this example we have mapped the first four drawbars in the Organ plugin:

8) Exit MIDI Learn by clicking on Learn, this icon will now be dark grey. However, ensure that Enable is still activated:

That's it, your controller is now mapped!
To learn more about MIDI Learn, please refer to the following articles:
Akai Pro MPC Beats & MPC 2.0 | Creating, Exporting, and Importing New Midi Maps : Akai Professional
Akai Pro MPC Beats | Assigning FX Parameters to your MIDI controller's Faders/Knobs : Akai Professional