ReValver® models guitar amplifiers, stompboxes and effects at the component level, resulting in unmatched realism, dynamics and tone. Now with the added power of Headrush FX, the software has an unprecedented level of tonal variety; and in exploring the possibilities you may find yourself wanting to tweak your tones and signal path via midi controls for your FX. This guide will help you connect up your midi controller to make on the fly changes to tone for recording.
TABLE OF CONTENTS
Connecting up your Midi Controller
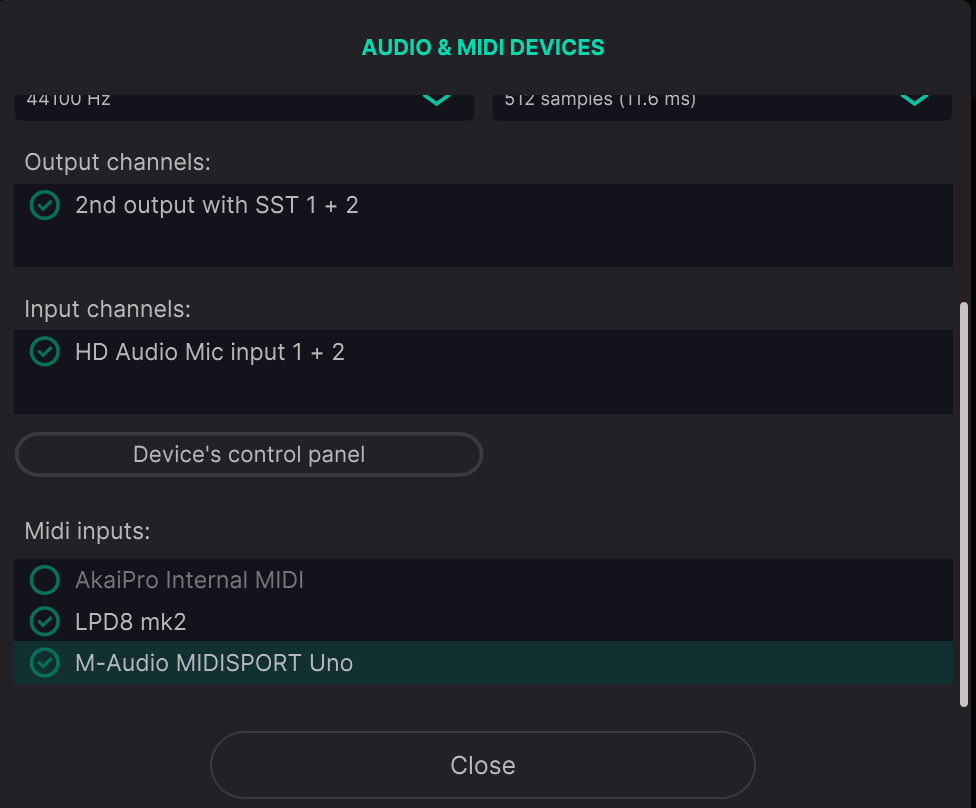
The first step will be connecting your midi controller to the software. Please note that if you are using a controller without a USB-Midi port like a foot controller, you'll need to use a midi interface and while using the software, the midi interface will be the device you refer to when making the connection; e.g. if your controller is using an M-Audio Midisport Uno for the Controller, the device will appear in Revalver as the M-Audio Midisport Uno.
Afterwards, you're going to click the settings icon in the top right corner of the screen, and enter the settings menu:

And press the Audio/Midi button in the first option:

From here, you're going to scroll down in the window and select your midi device(s) that you're going to use to control Revalver by clicking on the circles next to the device you want to use. Doing so will check off the circle:

Afterwards, close the settings screens. Congratulations, you can now map your device to Revalver.
Mapping your device to Revalver
In order to map your device to Revalver, you're going to want to go to the section of the device that you want to map, then Right Click(or Control+Click on Mac) on a parameter you want to map, then hover over Midi Mapping and click Create Midi Mapping for this control.
From here, you'll simply move a knob or press a button for whatever midi signal you want to control that parameter on the effect. The software will change from waiting for a message to map to it like this:
To having registered the message like this:

From here, close the software and feel free to try the parameter you have just mapped. Your usage of the parameter should reflect inside the Revalver's graphics. Anything in the graphics that you can click to get that mapping option will be able to be mapped inside Revalver.
Removing a Parameter/Remapping
If you find that you have mapped a parameter to a control that isn't well suited to it's control(I.E. a toggle switch being mapped to a knob.) you can erase a parameter by right clicking on the parameter, highlighting Midi Mapping and clicking "Remove Midi Mapping from this Control: ..." and then right clicking and mapping the parameter again.

Questions? Concerns? Feedback? If you are still having trouble, please use the New Support Ticket button at the top to contact our support team for further assistance.
