
MPC Beats will be made available via the inMusic Software Center after you have registered the unit. If you have not registered the Oxygen Pro or downloaded the inMusic Software Center, please click HERE.
1. First, connect the Oxygen Pro to your computer with the provided USB cable.
2. Press and hold the DAW button (#5) on your Oxygen Pro keyboard.
Note: On the Oxygen Pro Mini, and Oxygen Pro 25, press the Preset/DAW button when in DAW mode (button lit).

3. Using the Encoder directly below the OLED screen (#8), scroll to “MPC” and then press the Encoder to select it.
4. Press and hold the Shift button, and press the Global button.
5. Using the Encoder directly below the OLED screen, scroll to PC, and the press the Encoder to enter into selecting your OS.
6. Use the Encoder select Mac if you are using a macOS or Win if you are using a Windows OS.
Note: This setting is not available on the Oxygen Pro Mini, so this step can be ignored.
7. Open MPC Beats from your computer's Application or Program folder.
8. MPC Beats will list a selection of project templates and demos to get you up and running with the software. If you prefer to start with a clean slate click on Empty Project.

9A. If you are using Windows, click on the 3 lines in the top-left corner of MPC, then select Edit > Preferences, then select the MIDI/Sync tab.
9B. If you are using Mac OS, click on MPC in the top menu bar of your screen and select Edit > Preferences, then select the MIDI/Sync tab.

10. Copy the settings from the image below:

11. Now we will scan your plugins. Go to the Plugins tab, add a check to the first available box on the left, then click on the browse box at the end of that row to navigate to your plugin installation location.
Click on the drop-down menu at the right to browse and then select your plugin folder's pathway.
- Mac: Library/Audio/Plug-ins/VST
- PC: C:/Program Files/Steinberg/VstPlugins

12. Click OK to save your changes and go back to the main MPC screen.
13. On your computer keyboard, press Ctrl + Shift + L (windows) or CMD + Shift + L (Mac OS) to open the MIDI Learn panel on the right-side of your screen.
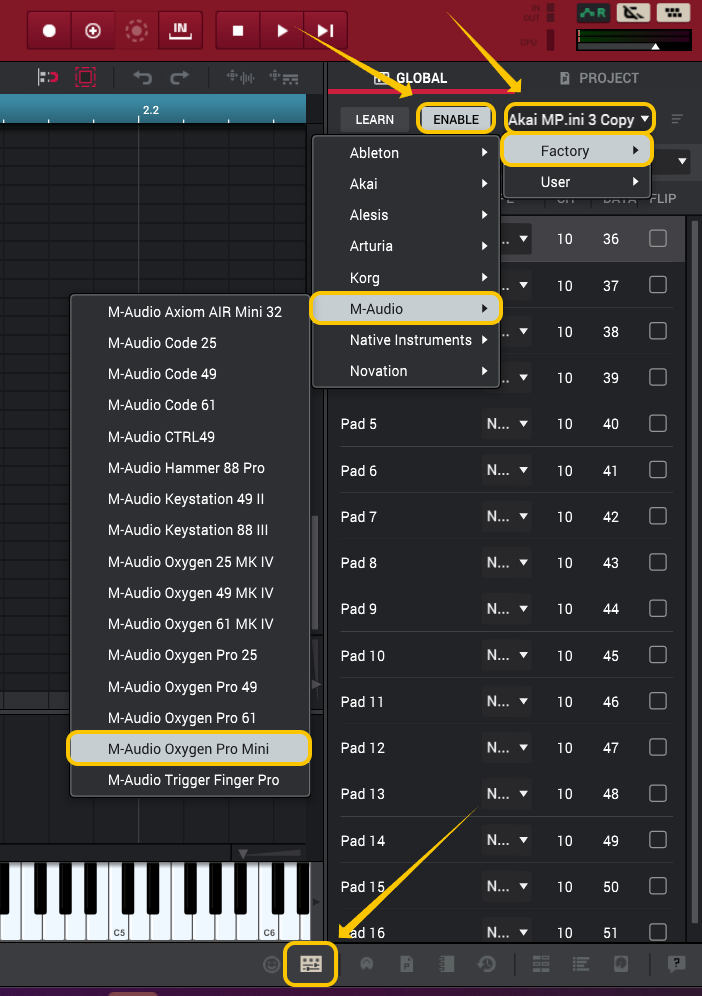
14. Put your Oxygen Pro into Preset Mode, click the ENABLE button in the MIDI Learn panel so that it is lit up, then from the dropdown menu, select Factory > M-Audio > your Oxygen Pro model.
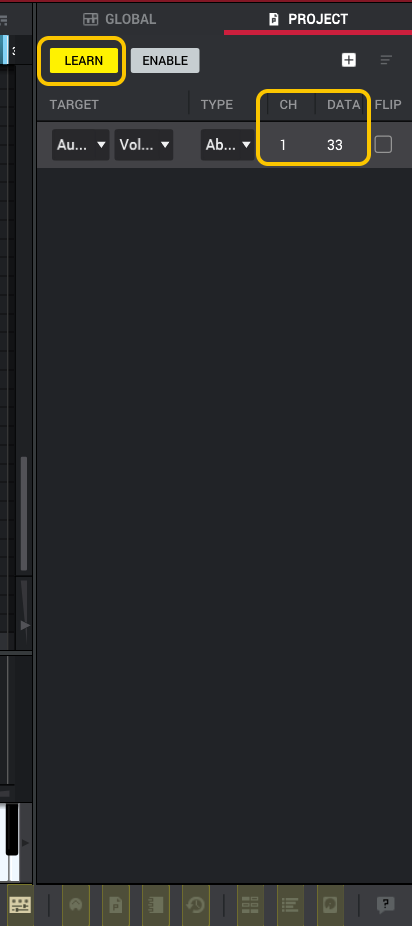
15. Select the PROJECT tab, select the plus icon, select your Audio Track or MIDI track from the first drop-down menu, then select Volume from the second drop-down menu:

17. Repeat steps 13 - 14 for any channel faders you wish to map in the future.